
TL;DR Don't have time to read the full article? Here are my top finds:
🏨Hotels and Vacation Rentals
📍Tours
🐻 Save time! Buy your National Park Pass before your trip
Devils Garden Trail: Arches National Park's Best Hike
Devils Garden Trail, located in Arches National Park, is one of the most memorable hikes I have done within the national parks system! I personally feel that Devils Garden Hike should be on any National Park lover's bucket list of hikes to complete.
This trail includes some of the most epic arches you can see in Arches including the famous Landscape Arch and the awe-inspiring Double O Arch.
Distance: 7.9 Miles total distance if you do the entire trail.
Elevation Gain/Loss: 1,085 Feet
Time: Four to Five Hours
Difficulty: Moderate to Difficult
Restrooms: Yes, Vault toilets at the beginning of the trailhead
Accessibility: This is not an ADA Accessible trail
Pets: Pets are not allowed on any hiking trails, or anywhere off-trail, even while in a carrier
Trailhead GPS coordinates: 38.782876, -109.594996

The Devils Garden Trail is located in Arches National Park on the eastern side of Utah, near the town of Moab and Canyonlands National Park.
The Devil's Garden Trail itself is located 18 miles (45 Minutes) North of Arches Visitor Center and the entrance of Arches National Park. Simply drive the main park road all the way up to the Devils Garden Campground and Devils Garden Trailhead parking lot. Camping at Arches gives campers the opportunity to walk right over to the trail from their campsite.
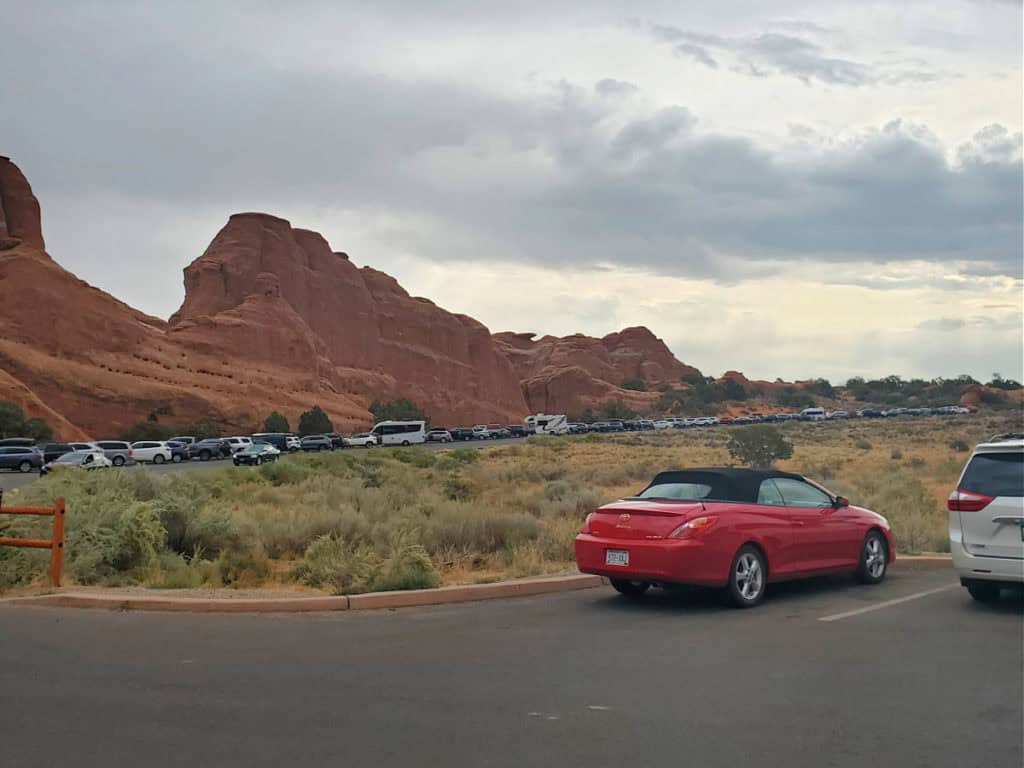
If you are not camping in Arches you will want to be prepared to show up early or be prepared to visit other trailheads or loop the parking lot a few times to try and get a parking spot. Devils Garden Trail and Delicate Arch Trail are the park's two most popular trails.
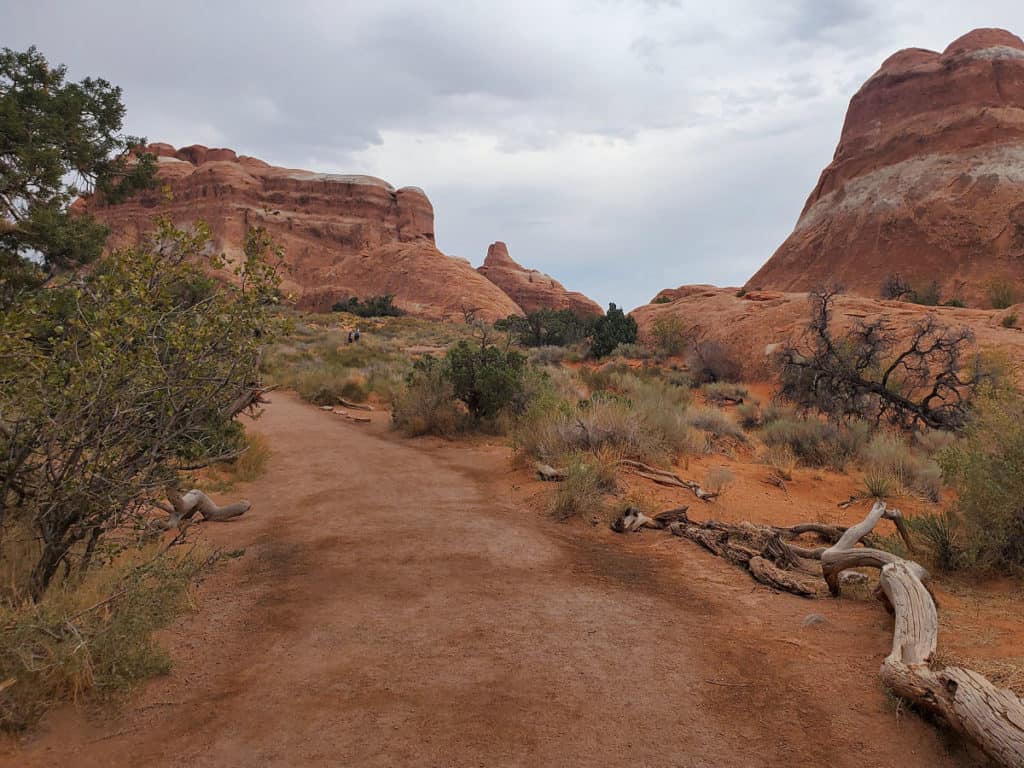
The trailhead has a couple of restrooms, trail guides, and benches for resting before heading out on the trail or when you get back. The cool thing about the Devil's Garden Trail is you get to decide how much of the trail you explore.
The Devil's Garden Trail affords park visitors the opportunity to get up close to 8 of the 2000+ arches located in Arches National Park on this hike.
The best part of this hike is you get to choose to make this hike what you want. You can choose to make this an easy .5 mile hike and see Tunnel Arch and Pine Tree Arch, a one-hour 1.8-mile roundtrip hike to Landscape Arch, a two to three-hour 4.2-mile difficult hike to Double O Arch, or hike all the trails in Devils Garden Making up four to five hours and 7.9 miles of adventure!
Arch #1: Tunnel Arch
Tunnel Arch is located in a large sandstone fin and appears to be a tunnel-like hole in the middle of the fin. It is also the first Arch you will come across on the Devils Garden Trail. I particularly like this arch as the blue skies really make the sandstone colors really stand out in photos!
You can Hike to Tunnel Arch and Pine Tree Arch and make it a .7 mile out and back hike. I would highly recommend continuing on towards Landscape Arch as it is truly incredible!
Arch # 2: Pine Tree Arch
The hike out to Tunnel Arch and Pine Tree Arch is easy and starts off going through large sandstone fins, the same fins that the arches you see started off as! This is an arch you can get up close to!
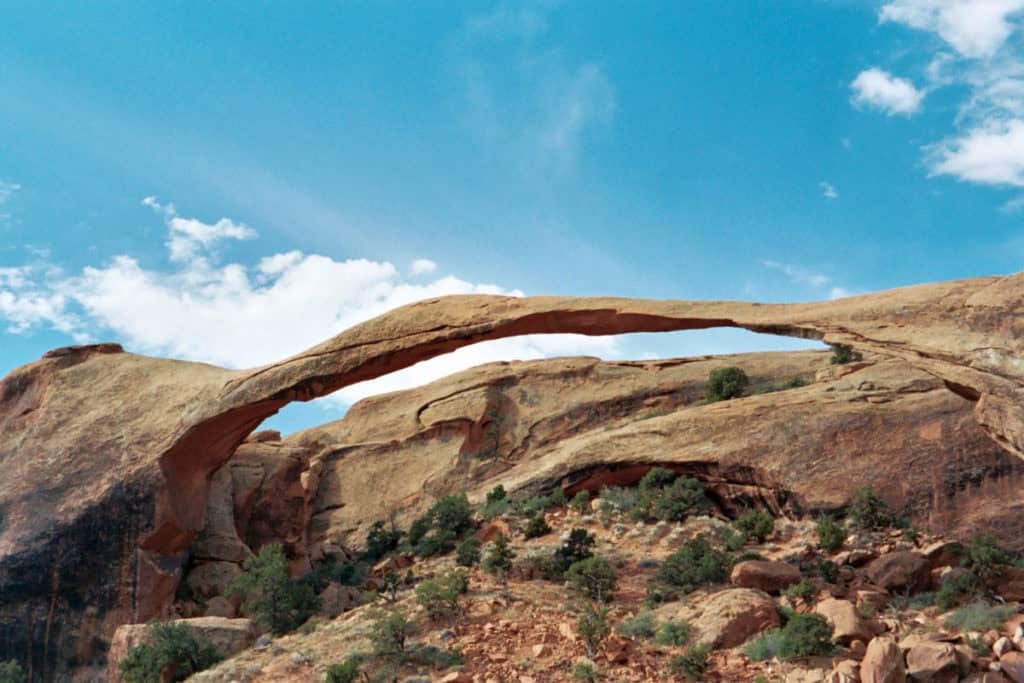
Arch #3: Landscape Arch
One of the highlights at Arches National Park is Landscape Arch! This arch is considered to be very mature in geologic time as it spans over 300 feet wide and in some places, the rock in the arch is only six feet thick!
Can you imagine the pressure being placed on that small section of rock? This means that it could fall any day or be there for the next 50 years we just don't know. I highly recommend any person who goes to Arches to make it to Landscape Arch.
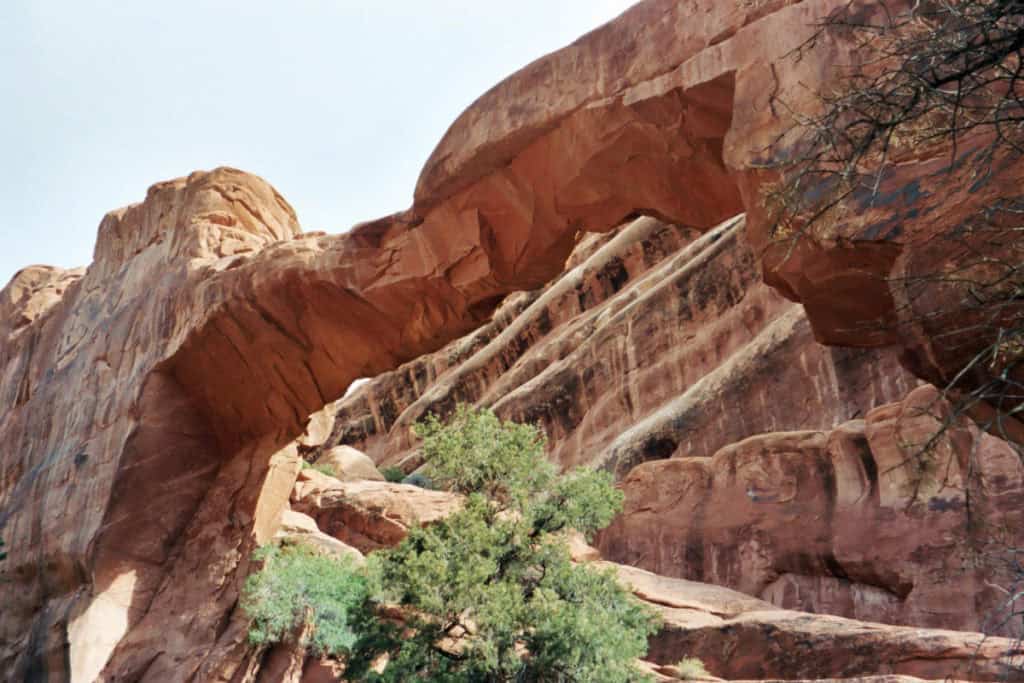
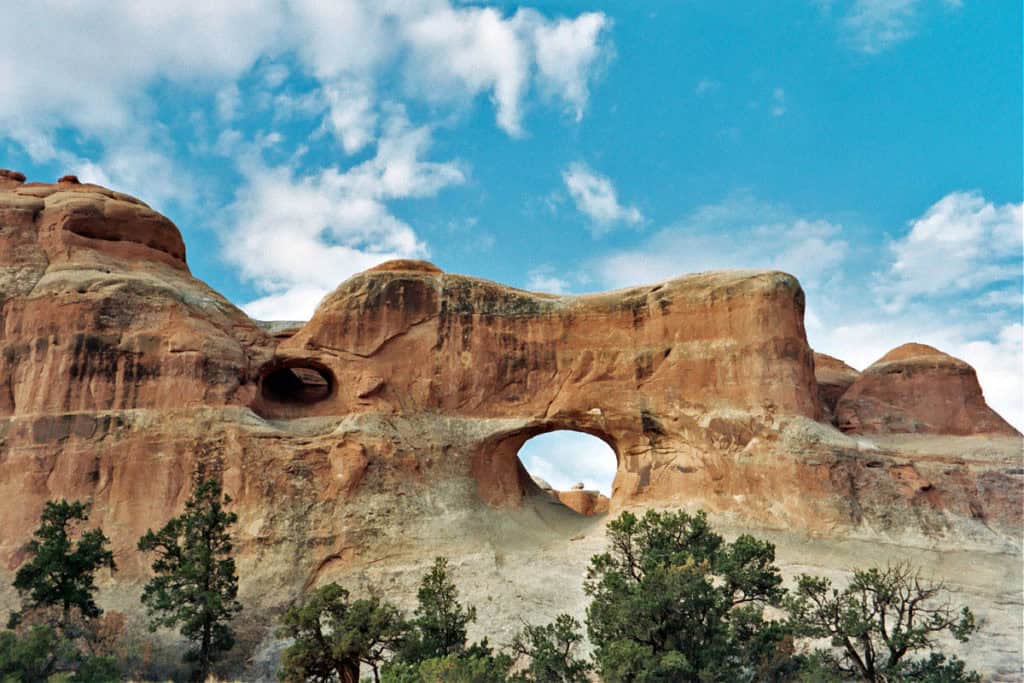
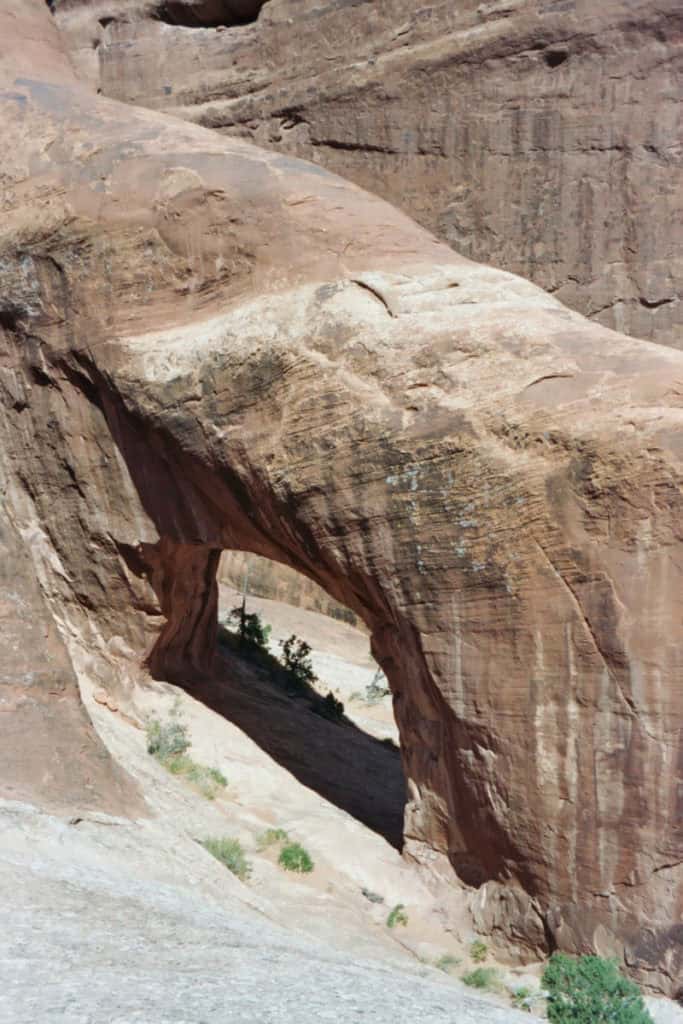
Wall Arch: A Reminder of Nature's Impermanence
I have been coming to Arches for over 20 years and absolutely love this place! This picture is a great reminder of just how delicate this park really is. This photo was taken on one of my earlier trips to Arches because it collapsed in the night on August 4, 2008.
It was the park's 12th largest Arch with a 71-foot span. The ironic part to me is that this arch was like a 3-minute hike from Landscape Arch which looks much more mature yet this was the one to collapse.
Arch #4: Partition Arch
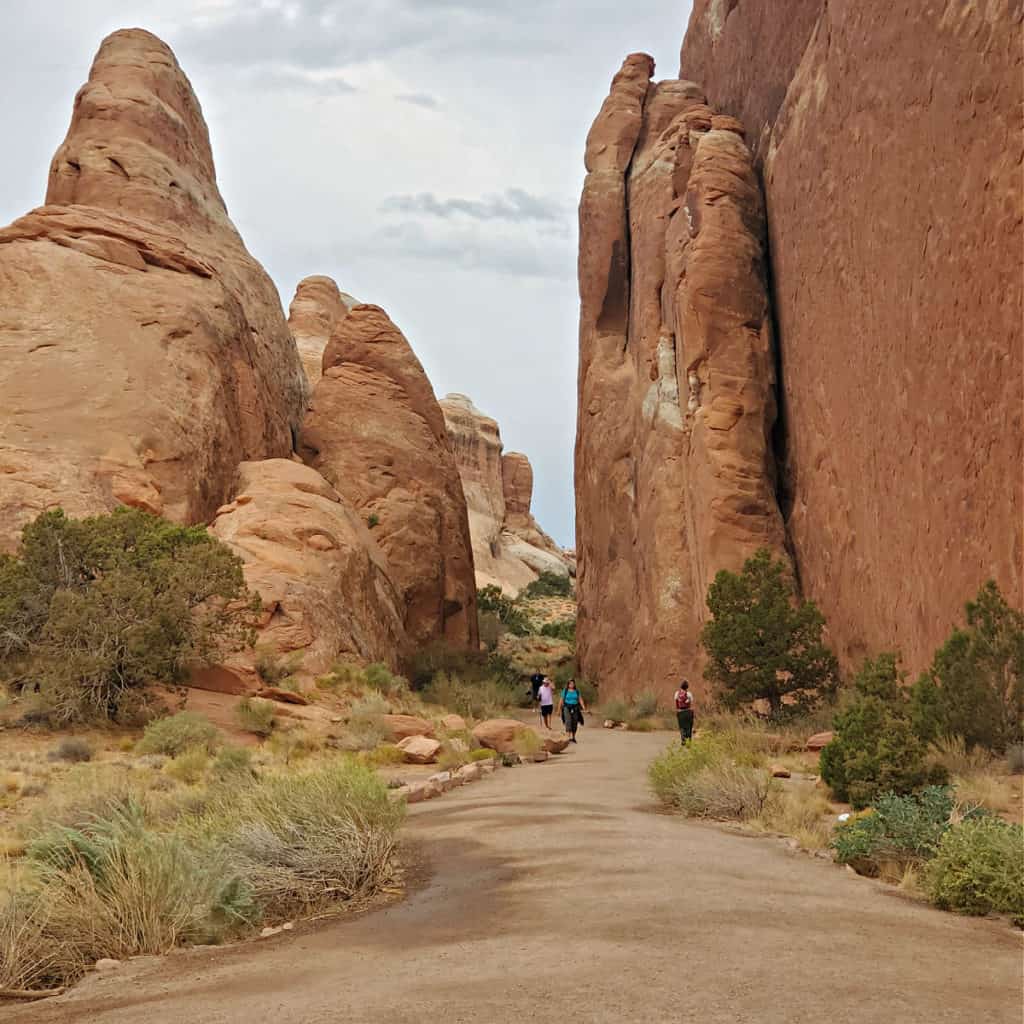
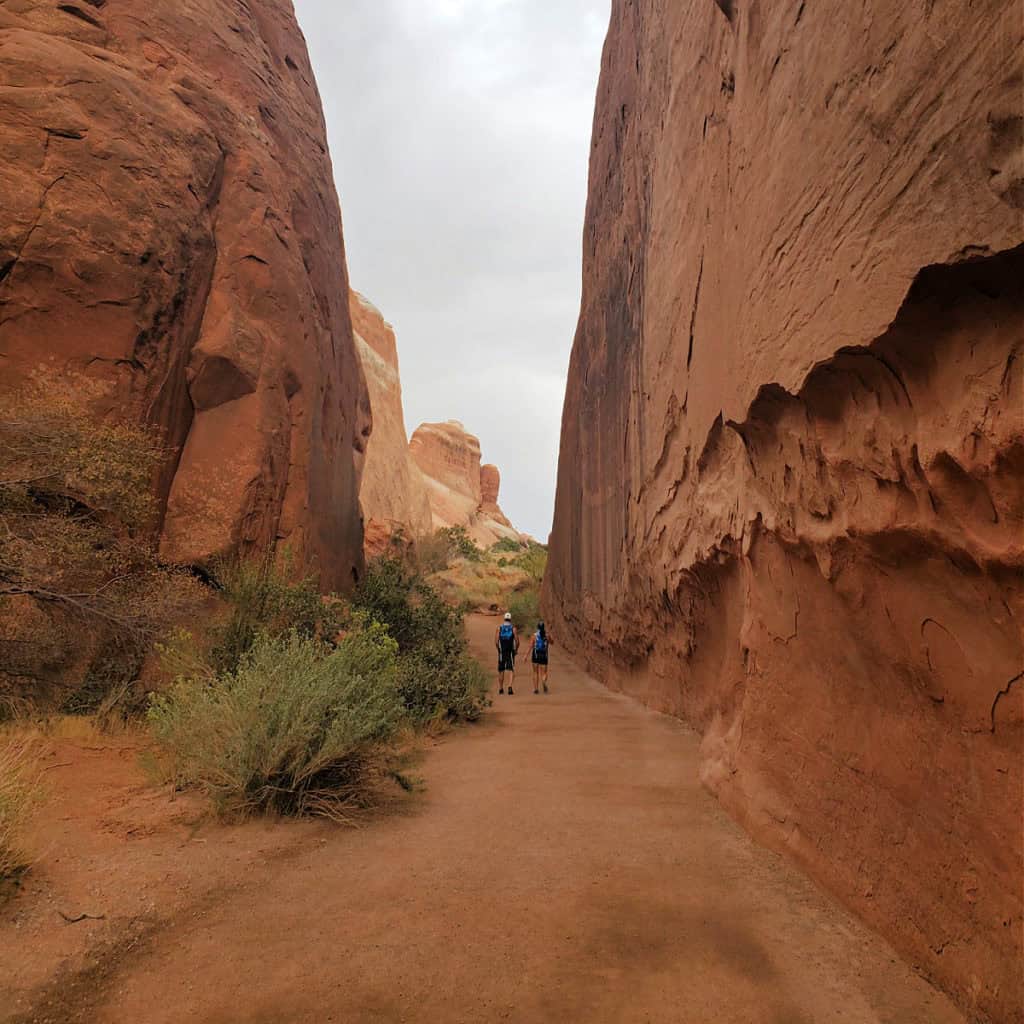
The hike begins to get much more exciting once you are past Landscape Arch. From here you hike on Sandstone Fins, the trail becomes more rugged and there are considerably fewer visitors.
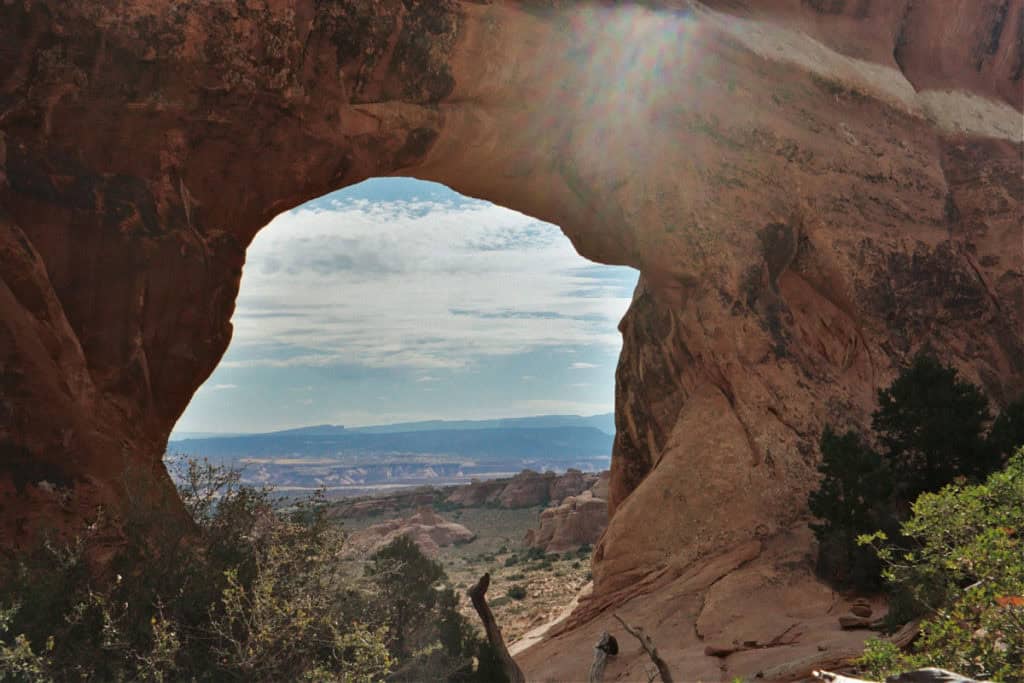
You can do Partition Arch or Navajo Arch in either order and both have great views. For Partition Arch, I really enjoy how you can see the park through the Arch!
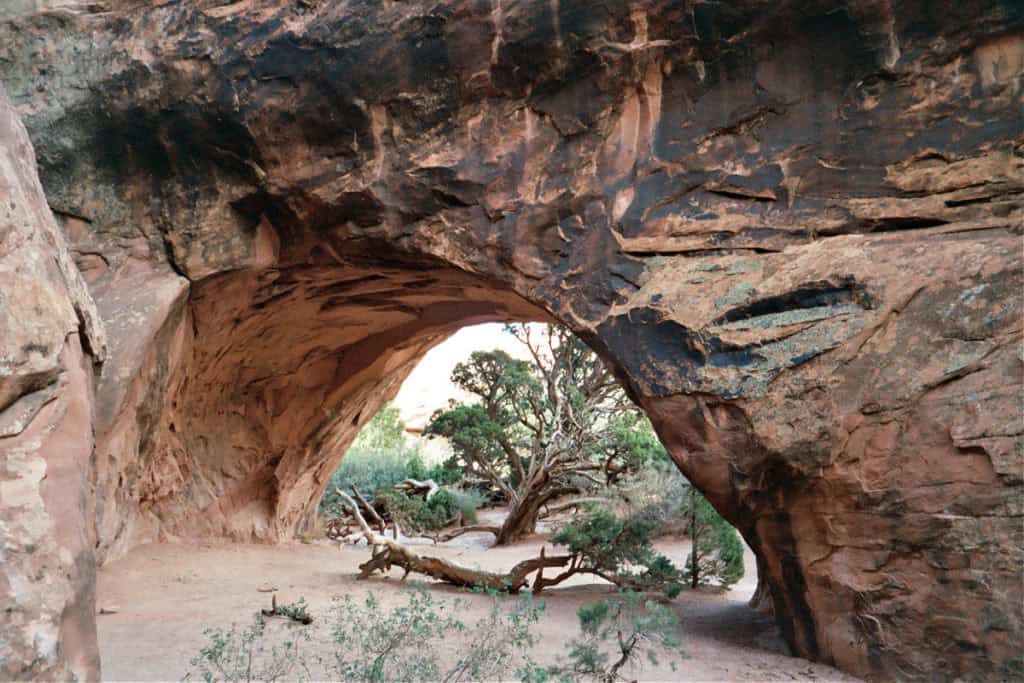
Arch #5: Navajo Arch
Navajo Arch photographs beautifully! The colors are rich and the tree on the opposite side provides great depth for photos. It also provides a very welcoming shade on a hot day making a great rest stop.
This arch is in the base of a fin giving it a tunnel or cave-like feeling making for a great reason to keep hiking past Landscape Arch.
Black Arch Overlook: Spectacular Views Betwen Arches
One of my favorite parts of hiking Devils Garden is hiking up and over a huge sandstone fin between Navajo and Partition Arches towards Double O Arch. The scenery here is some of the best in the park! you then arrive at the Black Arch Overlook.
The short detour to this overlook is worth the trip as you get to see Black Arch in the distance as well as more of the beautiful rock formations in this area.
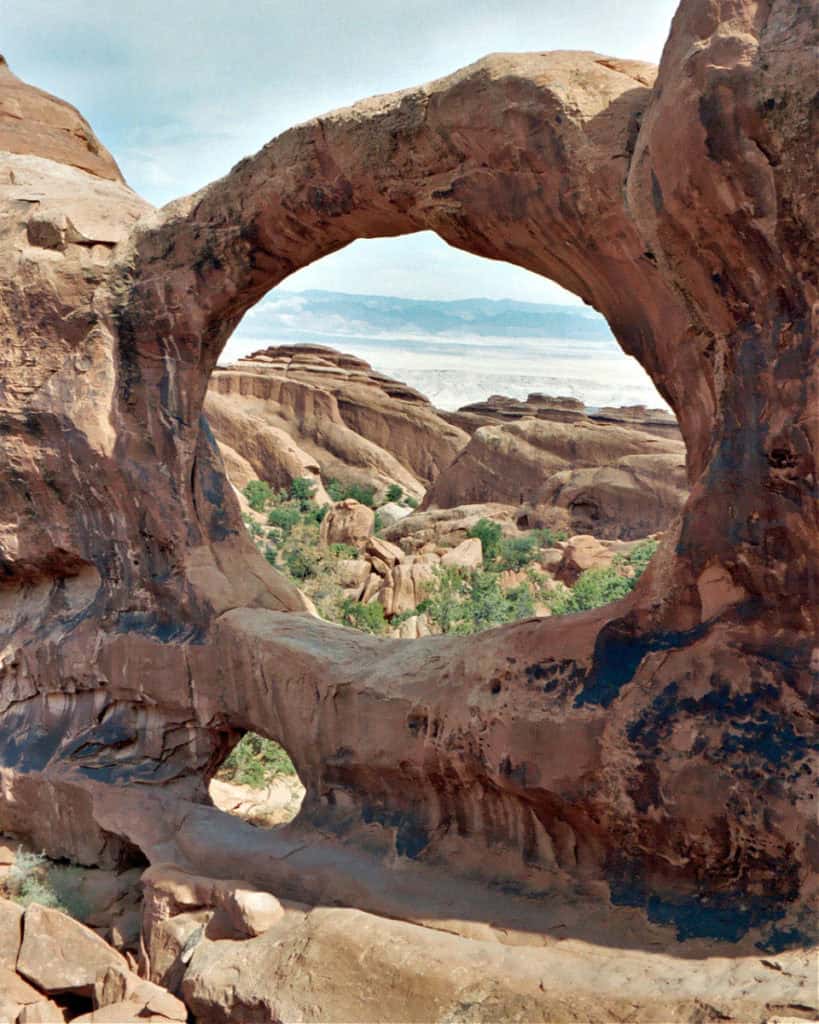
Arch #6: Double O Arch
This is one of my personal favorite arches in the park. The name comes from its small arch at the base with a much larger arch right above the first arch. It is towards the top of the Devils Garden Trail so it does take some work to get to it.
From here, you can walk back to the parking lot or take the off-shoot trail to the Dark Night or take the primitive trail that guides you by a few additional arches.
Dark Angel: 150 Fot Sandstone Column
For those who want to make their hike a little longer, you should check out the 150-foot tall sandstone column known as Dark Angel.
Arch #7: Private Arch (Via Primative Trail)
From Double O Arch, take the Primitive hiking trail. Private Arch is a nice arch to finish off a great hike and you could easily have it all to yourself!
Primitive Trail Lop: Navigation Tips for Advanced Hikers
For those who like adventure, the primitive trail will be a highlight of the hike. Anyone taking this trail should come prepared with the 10 essentials and be good at navigation.
There are several social trails that you can easily take from previous hikers who also became lost and off the trail. The easiest way to navigate this section is with a GPS.
Experienced hikers know to keep looking for cairns (trail markers made from stacked rocks). Look for the next cairn before walking and assume that you are on the trail.
Esential Tips: Parking, Water, and Sun Protection
Parking - I know I mentioned it earlier in this post but I have to say it again! Be prepared to wait for a parking space for a bit.
Water - Make sure to bring water with you! This trail does have areas of shade but it is still a hot desert area.
Sun - Be prepared with a hat, sunglasses, and sunscreen. While there is some shade other parts of the trail are out in the direct sun.
Arches National Park Tours
Arches 4X4 adventure from Moab: Remote Arches & Dinosaur Tracks
⭐️ Rating: 4.8 out of 5 Stars | ⏳ Tour Length: 4-5 hours | 🚌Check Rates and Availability
This is for anyone who wants to see Arches but doesn't want to deal with the parking nightmare or hike in a pack of 50 people. Your guide picks you up right from your Moab hotel, drives you into the remote sections of the park, and shows you arches like Tower Arch, Marching Men, and Eye of the Whale that most visitors don't even know exist.
The best part? You leave through the back exit and stop to see actual fossilized dinosaur tracks. Not a replica, not a museum display... the real thing embedded in stone.
👉 Book Your Spot Now: These tours sell out fast during busy months, so grab your date while it's open.
Private Guided Hike in Arches National Park: Six Hours at Your Own pace
⭐️ Rating: 5 out of 5 Stars | ⏳ Tour Length: 6 hours | 🥾Check Rates and Availability
Six hours with a guide who actually knows what they're looking at. They pick you up in Moab, take you to the park's best formations, and explain how all of this happened. How sand dunes turned to stone millions of years ago. How wind and water carved them into the fins, arches, and canyons you're standing in front of.
It's the difference between taking photos and actually understanding what you're seeing.
Since it's private, you go at your own pace. Want to spend 20 minutes getting the perfect shot? Go for it. Need to slow down on the uphill sections? No problem. It's your tour.
👉 Reserve Your Private Hike: Private tours need advance notice, especially if you've got specific dates in mind.
Canyonlands and Arches National Parks Airplane Tour: Two Parks in 80 Epic Minutes
⭐️ Rating: 4.9 out of 5 Stars | ⏳ Tour Length: 1 hour 20 minutes | ✈️Check Rates and Availability
Look at the reviews on this one. Seriously, go read them. People are not exaggerating.
You meet at Canyonlands Field Airport and fly over both parks while your pilot points out everything below: Upheaval Dome, the spot where the Colorado and Green Rivers come together, Landscape Arch, Fisher Towers, Devil's Garden, the Maze. Places that would take days of hardcore hiking to reach on foot, if you could even get to them at all.
In 80 minutes, you see more of these parks than most people see in a week. And from up there, you get why the landscape looks the way it does. The patterns and scale make sense in a way they just don't from the ground.
👉 Book Your Flight: Limited seats and weather restrictions mean you need to book ahead.
See all available tours at Arches National Park here.
Arches National Park Lodging
There are no National Park Lodges within Arches National Park.
The majority of lodging options can be found in and around Moab, Utah 5 miles Southeast of the parks entrance.
⭐️ 4.5 of 5 Stars - Fairfield Inn & Suites by Marriott Moab - Click here for Rates and Availability.
We have stayed here many times and really like staying at this hotel. There is easy access to the main road into Moab and to Arches. The pool area is amazing and the hotel has great amenities.
⭐️ 4.4 of 5 Stars - Under Canvas Moab - Click here for Rates and Availability.
Stay in luxury safari tents under the stars. This is an amazing place to spend time soaking in the red rocks and epic views.
⭐️ 4.6 of 5 Stars - Moab Resort - Click here for Rates and Availability.
look forward to a firepit, a playground, and a 24-hour gym. Stay connected with in-room Wi-Fi (surcharge).
Click on this link or the map below to see additional lodging options near Arches NP.
Arches National Park Entrance Fee
Park entrance fees are separate from camping and lodging fees.
Park Entrance Pass - $30.00 Per private vehicle (valid for 1-7 days from the date of purchase)
Park Entrance Pass - Motorcycle - $25.00 Per motorcycle (valid for 1-7 days from the date of purchase)
Per-Person Entrance Pass - $15.00 Visitors 16 years or older who enter on foot, bicycle, or as part of an organized group not involved in a commercial tour.
Annual Park Entrance Pass - $55.00, Admits the pass holder and all passengers in a non-commercial vehicle. Valid for one year from the month of purchase.
Non-commercial Groups (ex. scouts, a club, a church)
$30.00 for Non-Commercial Group with vehicle capacity of 15 or less.
$ 15.00 per person, not to exceed $40.00 for Non-Commercial Group with a vehicle capacity of 16-25
$ 15.00 per person, not to exceed $100.00 for Non-Commercial Group with a vehicle capacity of 25+
Commercial Tours
If you are providing these services, you must have a current, signed commercial use authorization to enter the park.
- Road-based commercial tours
- Guided Day Hikes
- Photography Instruction
For more information on commercial use authorizations, permit fees, and commercial entrance fees, visit this site.
If you are driving a bus in Arches, please click here for more information.
Learn more about National Park Passes for parks that have an entrance fee.
$80.00 - For the America the Beautiful/National Park Pass. The pass covers entrance fees to all US National Park Sites and over 2,000 Federal Recreation Fee Sites for an entire year and covers everyone in the car for per-vehicle sites and up to 4 adults for per-person sites.
Buy your pass at this link, and REI will donate 10% of pass proceeds to the National Forest Foundation, National Park Foundation, and the U.S. Endowment for Forestry & Communities.
National Park Free Entrance Days -Mark your calendars with the free entrance days the National Park Service offers for US citizens and residents.
Arches National Park Timed Entry Tickets
Arches National Park will not implement a timed entry reservation system in 2026. Visitors are encouraged to arrive early, explore lesser-traveled areas if certain locations are busy, and be flexible when enjoying the park.
Additional Arches National Park Guides
- The Complete Guide to Arches National Park
- Things to do in Arches
- Arches Hiking Guide
- Devils Garden Campground
- Sand Dune Arch Trail
Things to do Canyonlands National Park - Canyonlands National Park is only 30 minutes from the entrance to Arches.
Check out all of the Utah National Parks along with neighboring National Parks in Wyoming, National Parks in New Mexico, National Parks in Nevada, Idaho National Parks, Colorado National Parks, and Arizona National Parks.
Make sure to follow Park Ranger John on Facebook, Instagram, Pinterest, and TikTok


Leave a Reply